Ik weet niet of deze link hier al bekend is. Misschien nuttig ?
http://chronomania.free.fr/Articles/pratique/caisson-pandani/caisson-pandani.html
Ik weet niet of deze link hier al bekend is. Misschien nuttig ?
http://chronomania.free.fr/Articles/pratique/caisson-pandani/caisson-pandani.html
Leuke link… ook goed om het "frans"weer eens op te halen 
En of dit nuttig is bij mij lukt het fotograferen niet al te best ik wil dit zeker gaan proberen bedank voor de link
gr Pieter
als je hem voor mijn ook nog eens op nieuw Post hier maar dan in het NL… zou geweldig zijn!! :0
voor diegenen die engels makkelijker vinden, een soortgelijk artikel over het maken van een lichttent, ik zal zoeken of ik de link nog kan vinden
How to Make A Inexpensive Light Tent
The following tutorial on constructing an Inexpensive Light Tent was Submitted by Jeffrey Bail over at our Forums. I thought it was well worth highlighting here on the main blog too! See Jeffreyfs Flickr Account here.
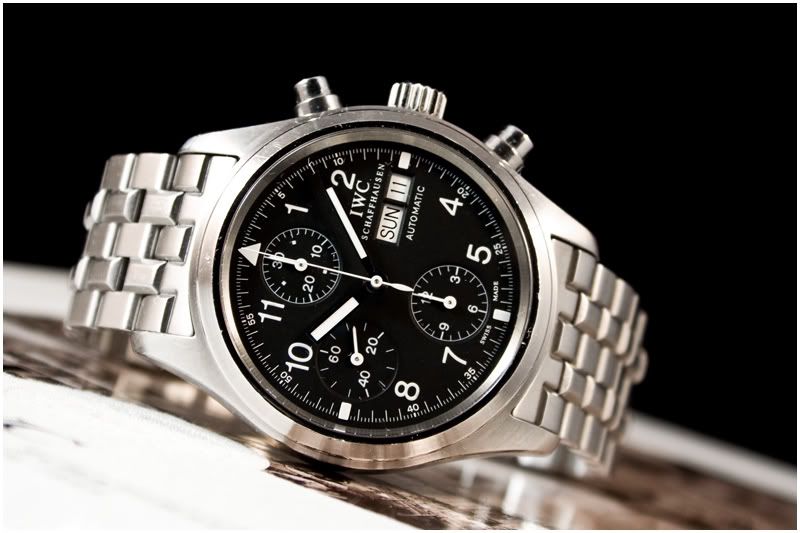
If youfre like me, you donft want to spend money if you can do it yourself and yield the same results. One day I was at my local photography store I saw one of these gPop-Uph light tents. It consisted of a collapsible white fabric box with a hole in the front and 3 lights - used for photographing small objects in photographic studios (like the shot of the chocolate reindeer to the left).
I was going to purchase it until I saw the $100 price tag. No way I am going to spend $100 on some fabric and 3 lights when the material costs far less. So I set off and built one of these light tents and it did not come out bad at all.
Get more free digital photography tips like this from our weekly email newsletter
Materials Needed:
1.) A Box - It could be any size you want as long as you can light it! I prefer it to be as square as can be. You can find boxes anywhere for free. I got mine from work in which they throw out anyway. You can also find boxes in the back of strip malls, grocery stores, appliance stores or basically any place that makes or sells products. Thicker the better! (Free)
2.) Fabric e This again could be any type. In my box I used white muslin fabric that is found at your local arts and craft store. Buy enough to cover the entire box. (4.00$ US or 1.99$ a yard) People suggested other fabrics like White Nylon and white fleece. If your extremely cheap and have some white under shirts laying around. Cut up the sides to where you have two halves of the shirt. If you use multiple shirts, be sure that the color matches or your end result may not turn out as you like it
3.) Tape e I use tape to secure the fabric to the sides of the box. Reason being is that In-case you want to try out different fabrics. I use regular masking tape. (1.00$ US A Roll)
4.) Glue e You can use a gGlue Stickh (1.00$ US a Stick) or spray adhesive (5.00$ US per Can) to stick the lining in the box.
5.) White Bristol board e This will line the inside of the box and will also serve as your back round (.50 a sheet X2). I would suggest to buy 2 or 3 sheets as you will be cutting up two to line your box (Could be more depending on the size of your box) and one for the back round. Bristol board is a heavyweight paper (.006 Thick) that is used in drawing/art. The name came from where it was originated, Bristol England. If you wanted a different back round you can also pick up different colors.
6.) Lights e You will need to light this box and this could be the most expensive part of the box unless you already have the lights. In my opinion lighting is the most important part of this box. Without it you will not get the picture you desire. I went to my local hardware store and picked up some gDaylighth Bulbs. Using regular light bulbs will cast a yellow light and should be avoided. I purchased gn:visionh 90 watt equivalent compact florescent bulbs ($7.00 US). Basically any gFull Spectrumh light bulbs will do.
Also suggest a lighting fixture. If you have a one of those desk work lamps, It will work fine. If you donft I suggest getting a gClamp On Work Lighth. At my local home depot they only had two kinds, A smaller reflector dish (5) for 5.99$ (US) or the 10.5 reflector for 11.99$ (US).
7.) Miscellaneous Tools e Tape ruler, Ruler or any straight edge, scissors and knife
Now that you have the Materials I will show you out to make a light tent step by step. When your done you can take nice clean and crisp product shots.
Step By Step Process:
A) Take your box with a tape ruler and marker and measure in 2 from the side of the box marking multiple points with your marker. When your done you will see your border, connect the points using your straight edge to where you should have a nice looking square/rectangle in the middle of the box with a 2 border around it. Leave the top and bottom of the box alone as you will not need to mark it
B) Cut out the boxes youfve drawn. Repeat that to the sides of the box where you have drawn the boxes. When youfre done, cut off the top of the box or remove the flaps on the top of the box. LEAVE THE BOTTOM INTACT!
C) Now take your Bristol board and make lines with your marker for every two inches 16 times. Then proceed to cut out 16 strips with your scissors.
D) Glue the paper strips into the box. Make sure the side with marker goes against the cardboard so it can not be seen.
E) Take another piece of Bristol board and cut is so the width is the same as the inside of the box and the length is much longer then the box.
F) Place the long piece of Bristol board into the box to where the piece curves to the bottom. Avoid creasing as it will show up in your photo. Cut off excess paper that is sticking out the top.
G) Cut your fabric to where it will cover the holes. Then cut a big piece to where it will cover the top of the box.
H) Tape the fabric to cover the holes in the box except the one that is facing your background. Then tape the top piece on.
YOUfRE DONE!
Now all you got to do is light the top of the box and start snapping away!
There are many variations you can do to get the photo you want. If youfre having a shadow problem I suggest lighting the other sides of the box. If youfre getting vignetting I suggest a lens hood or moving the lens more into the box. Photoshop could be a handy tool also! Since my lens and camera are not the cleanest I tend photoshop the dust that is sitting on or in my camera. I also adjust the levels so itfs brighter.
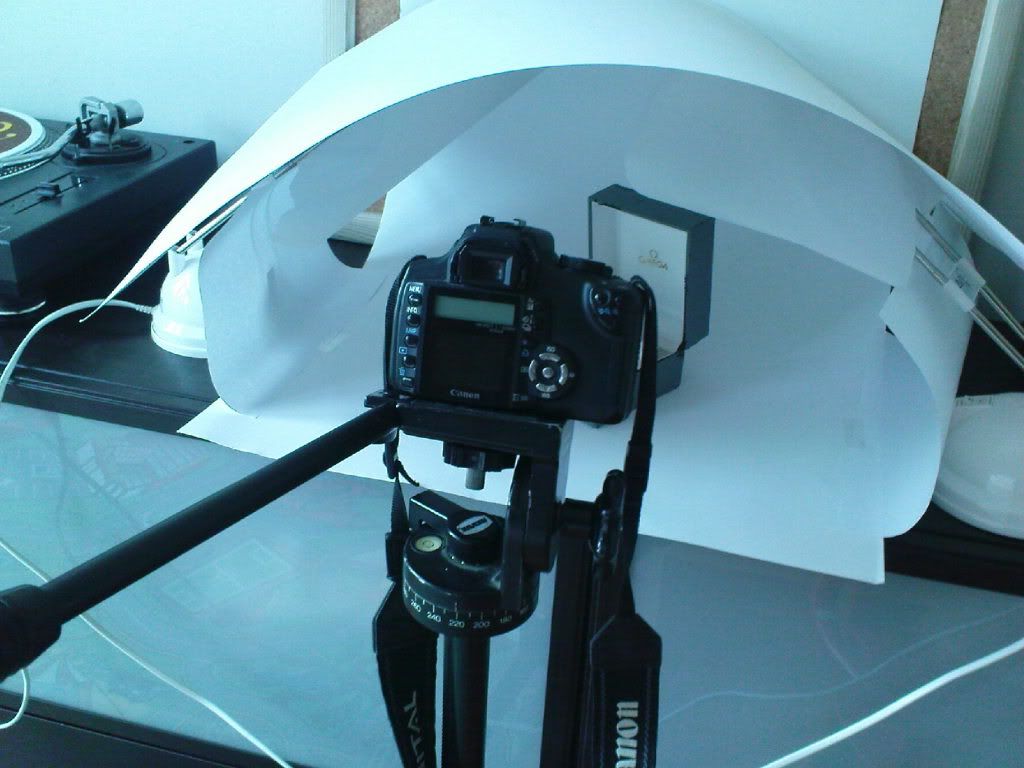
Camera sticking into the box
The Light box in action
Another Result of the above light box
If youfd like to leave a comment or ask Bail a question about this process head over to the forum thread where he originally posted this.
Digg This Here
Google mbv jouw 1e zinnetje, chronome:
Maak eenvoudig je eigen lichttent:
http://www.ikea.com/us/en/catalog/products/30073090
http://filebox.vt.edu/users/kmckevin/itma_kevin/projrep/lightbox.swf
In Computer!Totaal heeft eens een artikeltje gestaan over het fotograferen van kleine artikelen.
Hier
staat de link.
Leuk zeg! Dit ga ik binnenkort even proberen.
Heb het daarnet in elkaar geflanst en ik moet zeggen het heeft een mooi resultaat.
Als ik wat foto’s gemaakt heb zal ik ze posten.
Alleen is het niet zo stevig, je zou het al met stevig papier moeten maken vooraleer het een mooi egale ‘toren’ is. Ik heb het met gewoon print papier gemaakt en dat is niet echt stevig.
Staat ook bij dat je 160 grams papier moet gebruiken.
Heb ik ook wel gelezen. Maar ik heb thuis niet alle soorten papier liggen hoor.
“Roeien met de riemen die men heeft é.”
hahah, da’s waar.
je zou nog kunnen proberen twee blaadjes op elkaar te gbruiken.
Dat ziet er toch supermooi uit hoor.(tu)
Ziet er goed uit dimer(tu)